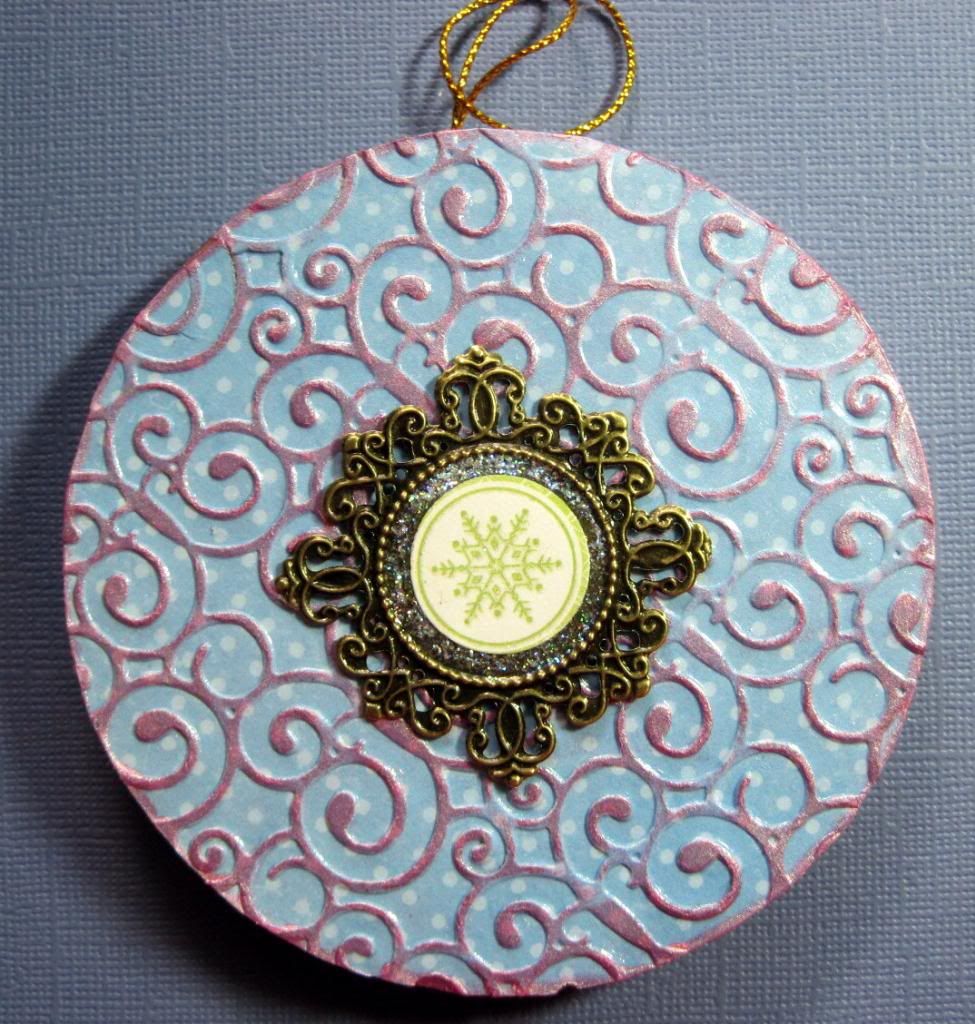
I know it's only June but that does only leave six more months before Christmas time again so it's never too early to get ready by making some simple yet beautiful Christmas ornaments.
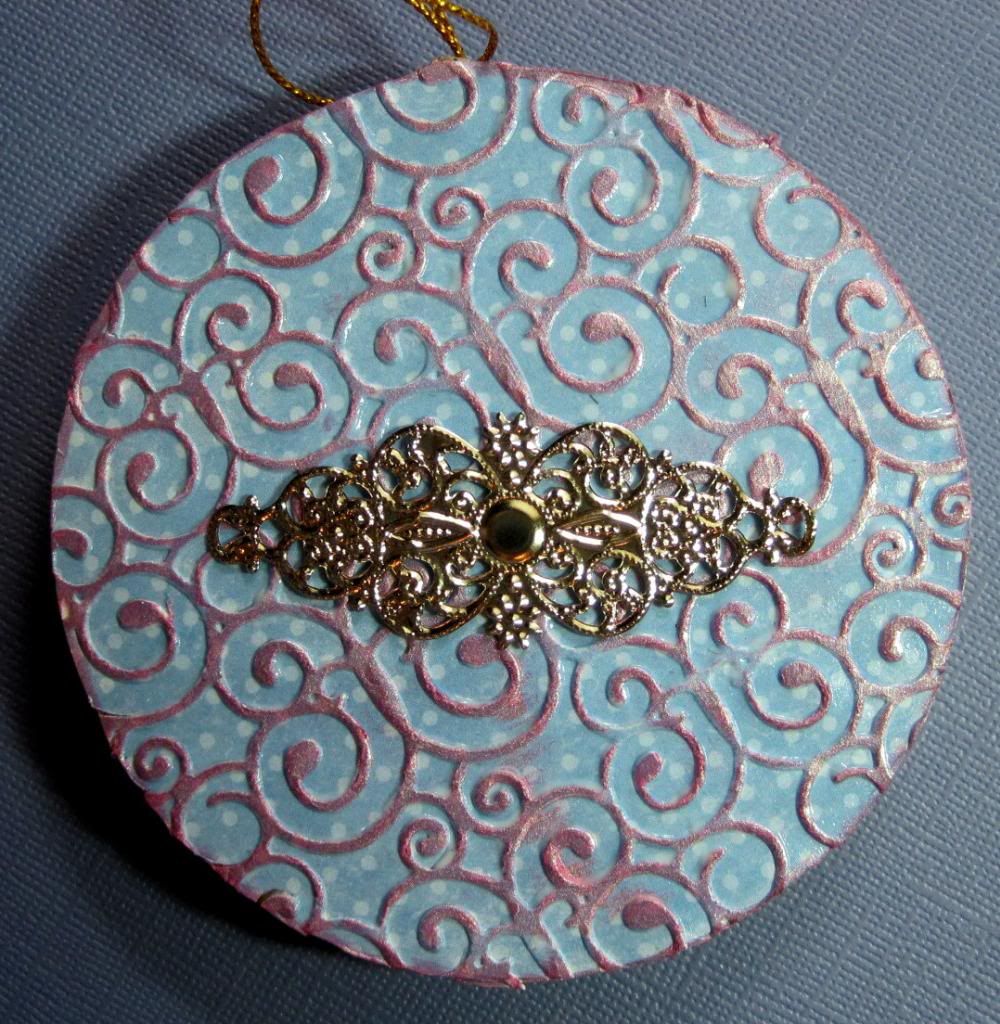
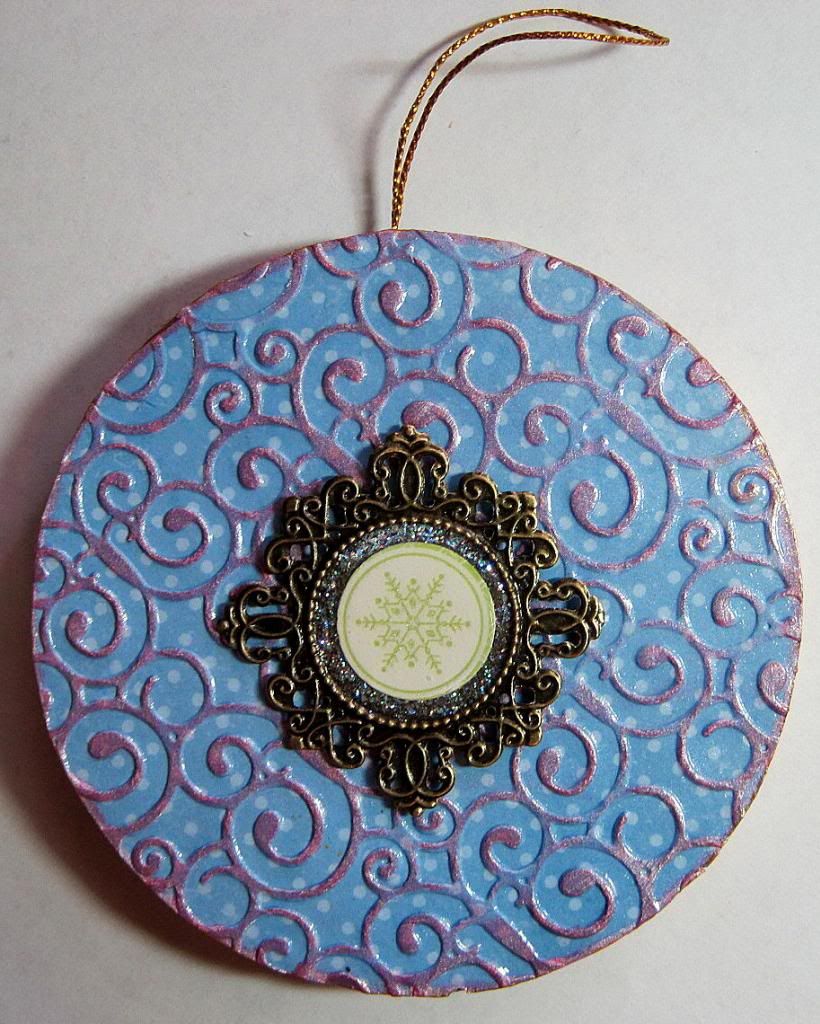
Here is an ornament I just made using one of the beautiful
metal embellishments from Miriam's Crafting Supplies.
-----------------------------------------------
Here is the tutorial on how I made it.
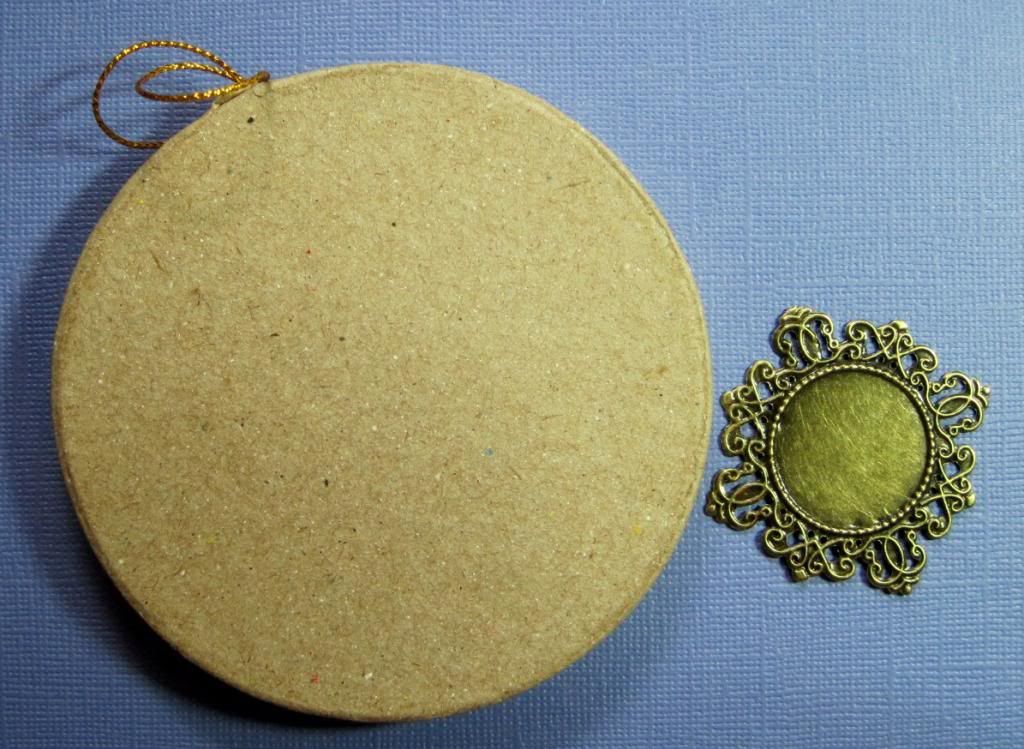
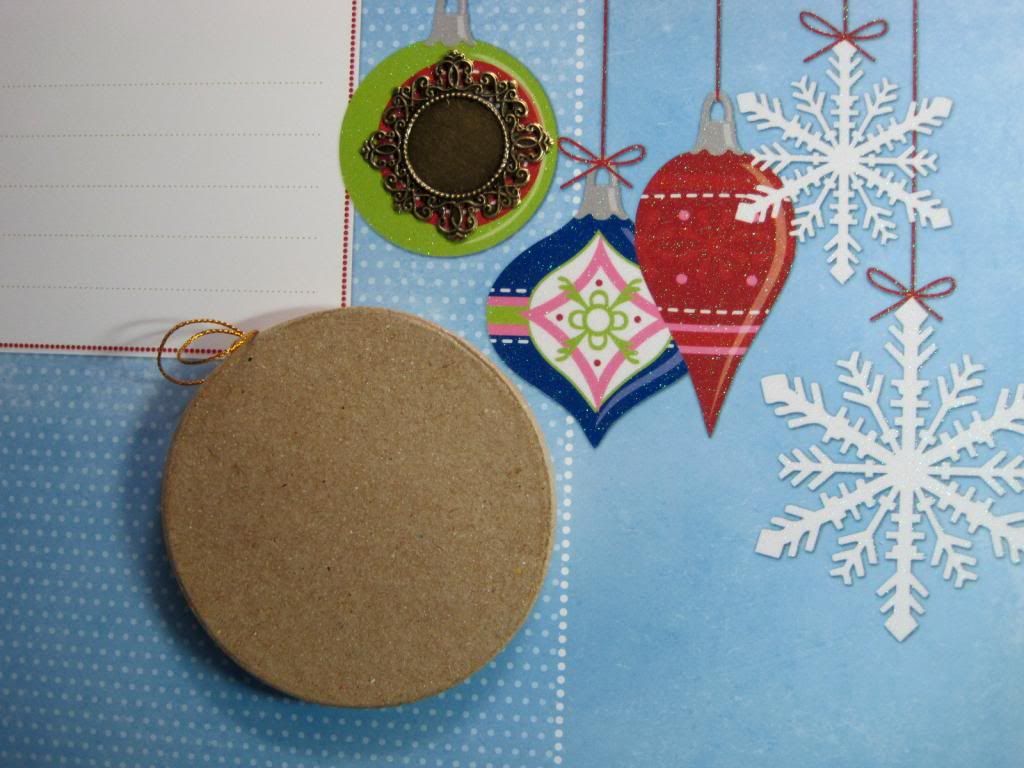
I found this cardboard ornament in the clearance bin at Michaels. I head to the clearance bins now before checking out the sales. I also picked out a metal embellishment I liked from all the pretty
metal embellishments that Miriam's Crafting Supplies carries.
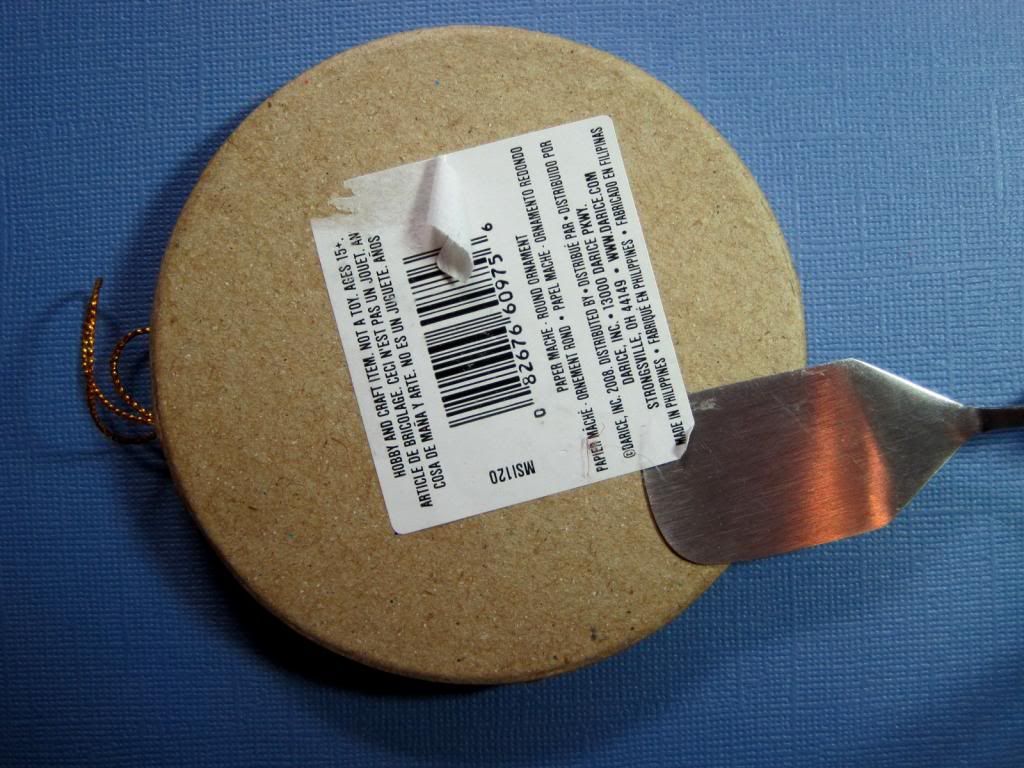
1) Remove the sales tag from the back. The reason being, is that sometimes the tag is so glossy that paper doesn't want to adhere to it. I have found that using the spatula for die cutting mats is helpful.
If you take some of the layers of the cardboard off, don't worry. You'll be covering it and won't notice when you're finished.
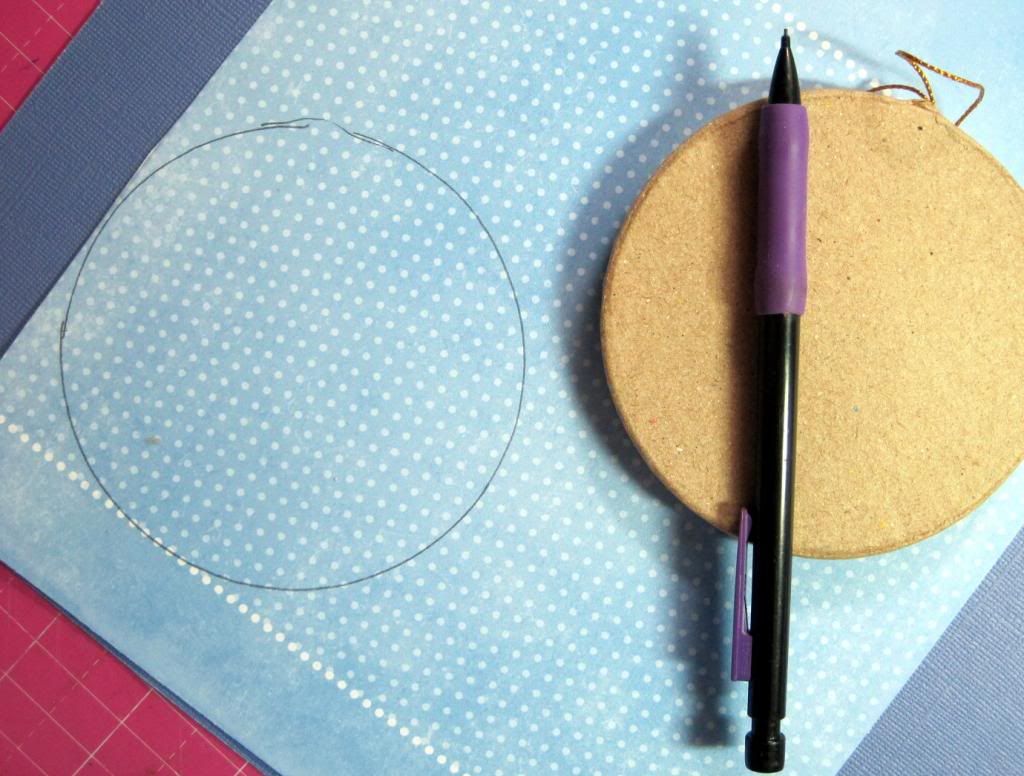
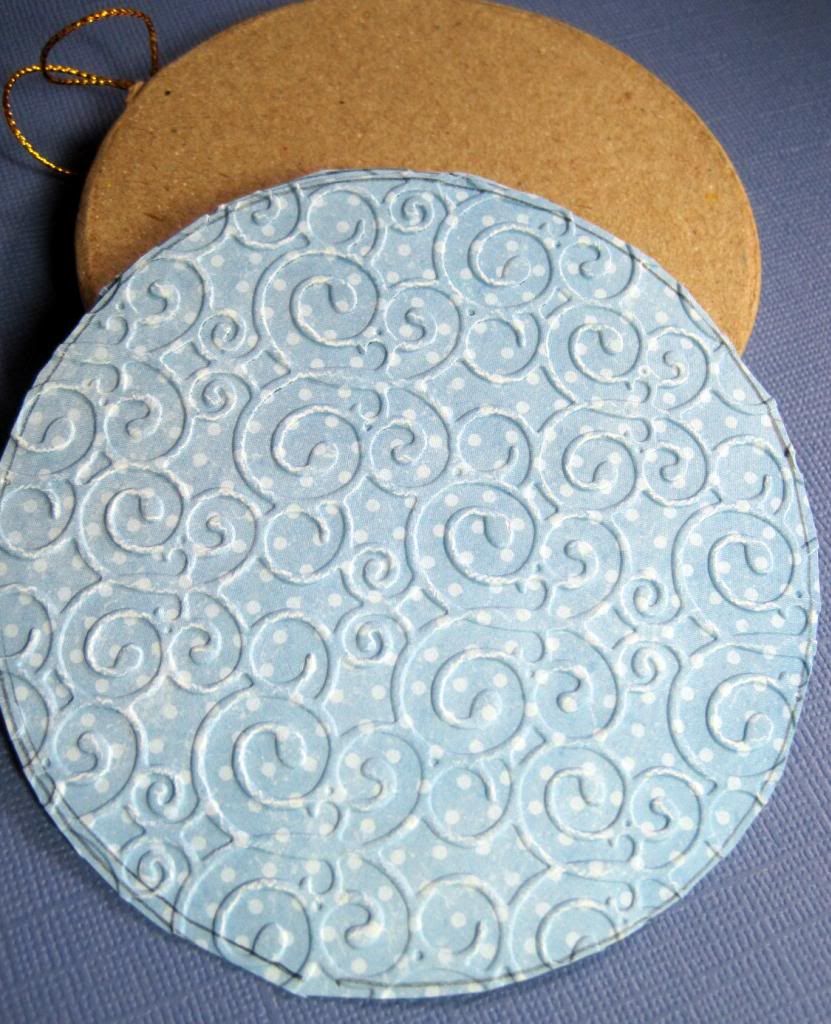
2) Trace around the outside of the shape but leave a little excess to work with. This will be trimmed off after the paper is glued down.
I picked paper from the
3) Cut around your circle and use your embossing machine and the embossing folder of your choice to add a raised design to the paper.
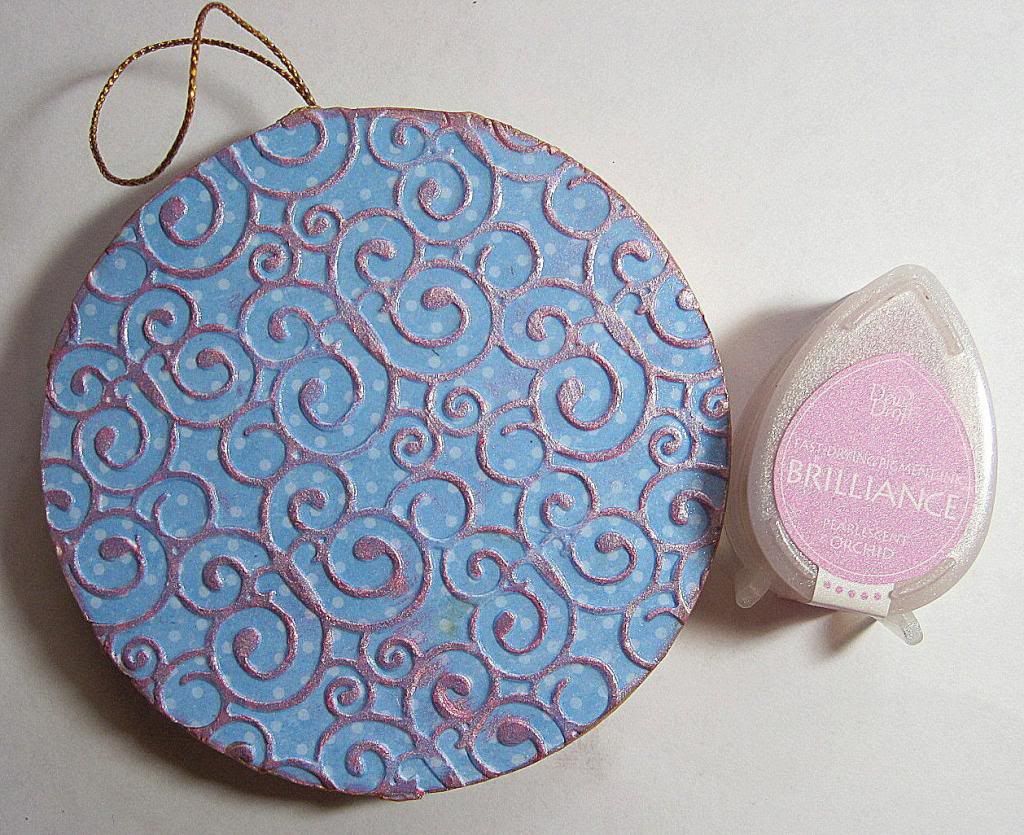
4) Use Mod Podge to adhere the paper to the ornament and us a utility knife to trim off any excess.
5) Lightly touch the raised embossed design with your ink pad to give color to the raised print. I used a pigment ink in pink. Coat with Mod Podge to seal the ink so it wouldn't smear.
I tried different
metal embellishments to see which one I would like best and I went with this one. All the metal embellishments came from
Miriam's Crafting Supplies Store and anyone would have been beautiful.
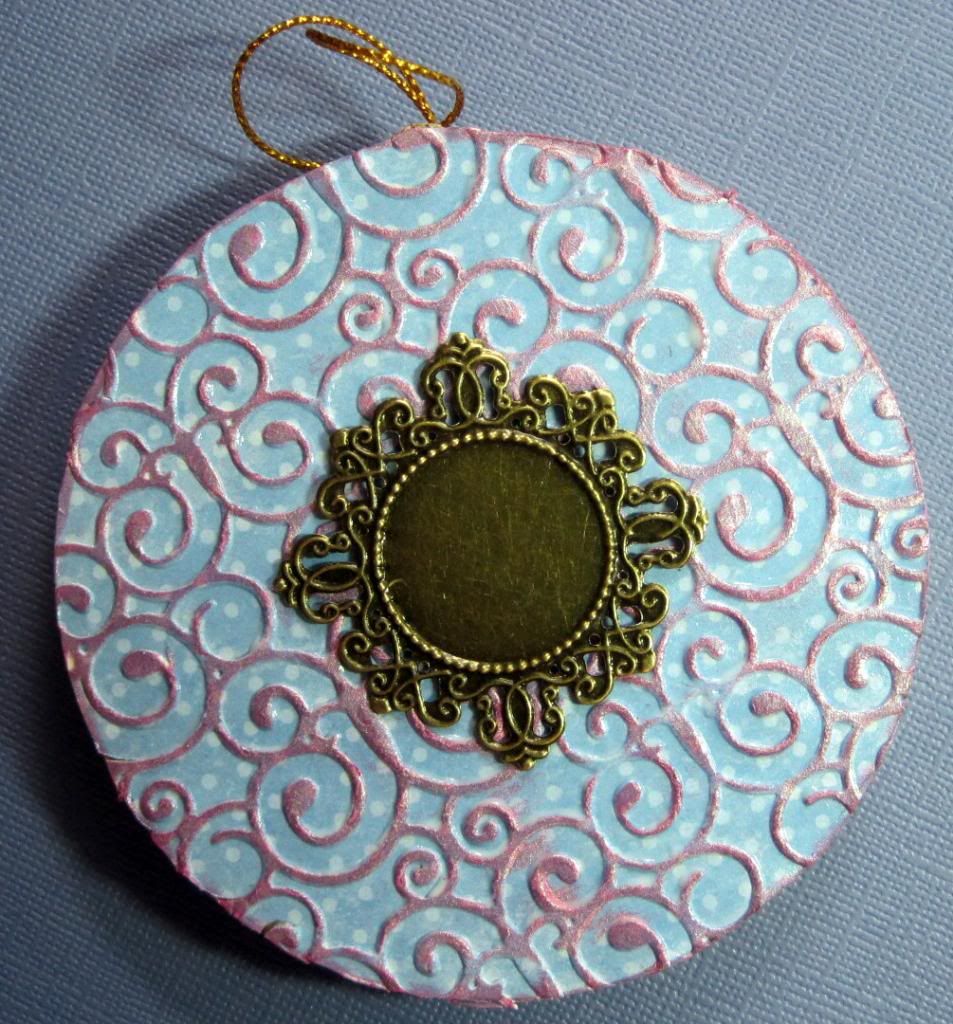
6) Add Stickles glitter glue to the very outside of the circle and then glue the picture in the middle. I cut a snowflake from the winter pad. There was already glitter on the snowflake. Add Glossy Accents to the snowflake for a nicer look.
7) While everything on the metal embellishment is drying, paint the outside edge of the ornament in gold acrylic paint.
8) Before adding the embellishment take the ornament outside and spray all of it with a clear finish. I used Krylon Low Odar Clear Finish. This will help your ornament last for years to come.
9) Finally, add the embellishment using a low heat glue gun.
Thanks for stopping by today and please join us at
Miriam's Crafting Supplies Blog Challenge. This month's theme is metal which can be one of the beautiful embellishments from above or a metal charm or anything else as long as it is metal or has metal.


No comments:
Post a Comment
Thank you so much for visiting Lorby's World today and leaving a comment.